The quick answer
If you’ve searched for how to actually soundproof a room, you’ve probably already found the two things that don’t work: foam panels, and hope. Room-in-a-room construction is the method that does work, and it’s the same underlying technique whether it’s built by a contractor over three weeks or delivered as a modular booth in a single afternoon. Here’s what it actually is, how it works, and the two realistic ways to get one.
What “room in a room” actually means
Room-in-a-room soundproofing is exactly what it sounds like: you build a second, structurally independent room inside your existing one. The new walls, floor and ceiling don’t touch the original structure at any point. That gap is the entire point. Sound can’t cross open air anywhere near as effectively as it can cross solid, connected framing, so by physically separating the two structures, you stop sound from using the building itself as a conduit.
This is a genuinely different approach to the one most people try first: covering a wall in acoustic foam. Foam panels absorb sound energy inside a room, which reduces echo and improves how a space sounds internally. That’s a real and useful effect, but it isn’t isolation. Foam does nothing to stop sound travelling through the wall, floor or ceiling to the room next door, because it doesn’t address the structural pathway sound is actually using. A drum kit behind foam panels is still a drum kit shared with your neighbours; a drum kit inside a decoupled room-in-a-room isn’t.
If your goal is to keep sound in (or out) of a space entirely, rather than just improve how that space sounds, room-in-a-room is the only method that does it. Acoustic booths like the ones in Envoy’s acoustic booths range are, structurally, a manufactured version of exactly this technique.
The four elements that make it work
Every effective soundproofing build, whether it’s a stud-framed room extension or a prefabricated booth, relies on the same four physical principles working together. This is the standard framework acoustic engineers use to explain sound isolation, and it’s worth understanding each part on its own before looking at how a build (DIY or prebuilt) puts them together.
Decoupling. Sound is a vibration, and vibrations travel efficiently through anything solid and connected. Decoupling means physically separating the new structure from the old one, so there’s no direct path for that vibration to follow. In a room-in-a-room build, this is the independent frame and the floating floor or ceiling that never touches the original walls, joists or slab.
Mass. A heavier, denser barrier is harder for sound energy to push through than a light one. This is why soundproof construction leans on multiple layers of dense material, most commonly extra layers of drywall, rather than a single thin sheet. More mass generally means better isolation, though mass alone struggles with low-frequency bass, which is why it’s never used on its own.
Absorption. Wall cavities are hollow, and hollow cavities resonate, carrying sound across the gap even in a well-built frame. Filling that cavity with insulation, such as mineral wool or fibreglass batting, absorbs some of that resonance. It’s the smallest contributor of the four elements individually, but it meaningfully improves the other three.
Damping. Damping compounds, most commonly a viscoelastic layer like Green Glue sandwiched between drywall layers, convert vibrational energy into a tiny amount of heat instead of letting it pass through as sound. Damping doesn’t replace decoupling, mass or absorption; it makes them work harder by reducing how much the wall itself vibrates in the first place.
None of these four elements substitutes for another. A wall with excellent mass but no decoupling still transmits sound efficiently through direct contact. A well-decoupled frame with no damping still vibrates more than it needs to. Real isolation comes from combining all four, and that’s true whether you’re building the room yourself or buying one that’s already engineered this way.
Building it yourself: what it actually takes
If you’re planning to build room-in-a-room isolation into an existing space, it’s worth being clear-eyed about the scope before you start, because it’s a genuinely different project to hanging foam panels on a weekend.
A real build means an independent stud wall built a few inches inside your existing wall, on its own floating floor system so it never contacts the original floor structure, and its own decoupled ceiling so vibration can’t travel over the top of the new wall and back down the other side. Inside that frame, you’re adding insulation for absorption, multiple layers of dense drywall for mass, and a damping compound between those layers. Every one of the four elements above has to be present, and it has to be present consistently across every surface, not just the wall you’re most worried about.
That consistency is where most DIY builds fail. Acoustic engineers refer to this as flanking noise: sound finding an indirect path around your isolation rather than through the wall you built. A perfectly built wall means nothing if sound can still travel through a shared ceiling void, an electrical outlet box, a gap around a door frame, or a ducting run that connects the new room back to the rest of the building. It’s the single most commonly cited reason DIY soundproofing projects underperform, and it’s also the hardest part to get right without acoustic engineering experience, because the failure point is rarely obvious until you’ve already finished the build and tested it.
Beyond the technical difficulty, there are three practical costs worth weighing honestly. First, floor space: a genuine room-in-a-room build typically eats somewhere in the order of 15 to 30cm off every wall it’s built against, since the new frame needs a real air gap to be effective. In a small room, that can meaningfully shrink the usable space. Second, cost and trade time: this is structural building work, not a materials purchase, and it usually means engaging carpenters and plasterers over a period of weeks, not a weekend project with a hardware store trip. Third, and often overlooked, it’s a one-way structural change. Once you’ve built a floating floor and an independent stud wall into a room, undoing it is close to as much work as building it was. If you’re in a rental property, or a leased commercial or office space, that’s not a minor detail. It’s frequently the deciding factor.
The prebuilt alternative: how a Studiobricks booth gets you the same result
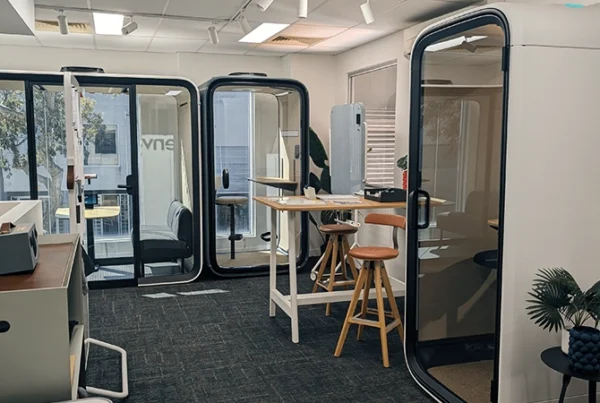
A modular acoustic booth applies precisely the same four elements described above, engineered, tested, and manufactured as a kit rather than built on site from raw materials. Studiobricks booths use a patented panel system with double or triple-wall panel construction, insulation for internal absorption, and sealed tab-and-groove joints, which handle decoupling and damping without adhesives or structural fixings. It’s the identical physics as a site-built room-in-a-room, just engineered once by acoustic specialists and reproduced consistently in every unit, rather than depending on how carefully one crew executes a one-off build.
The performance numbers are independently meaningful here rather than a marketing claim: Studiobricks’ double-wall booths deliver an average of 45dB of sound isolation, ISO 717-1 compliant, and the triple-wall configuration averages 47dB with peak isolation up to 62dB at certain frequencies. Those figures put a prebuilt booth in the same performance territory as a well-executed site-built room-in-a-room, without the multi-week build.
The practical difference is in what you avoid, not what you gain acoustically. There’s no construction trade work, no weeks of dust and disruption in your existing space, and Envoy’s team handles delivery and installation as part of the process rather than leaving you to manage subcontractors. Because the panel system is tool-free and doesn’t rely on adhesives or fixings into the surrounding structure, a booth can also be disassembled and relocated if you move premises, which a site-built room-in-a-room simply cannot do. For a rented office, a leased studio, or a school that doesn’t own its building, that reversibility is often the deciding factor rather than an afterthought.
If you want to see the panel system in more detail, our guide to how a Studiobricks booth is actually built walks through the construction, and the full Studiobricks range covers the standard sizes. If none of the standard configurations fit your space, it’s also possible to build a custom booth to your dimensions, up to 50m² and 3.9m in height.
DIY room-in-a-room vs. a prebuilt booth: which makes sense for you
Both approaches use the same four-element physics and can reach comparable isolation performance. The difference is almost entirely in cost structure, timeframe, and how reversible the outcome is.
| DIY room-in-a-room | Prebuilt acoustic booth | |
|---|---|---|
| Cost | Materials plus carpentry and plastering trade labour, typically the larger spend | Fixed unit price inclusive of delivery and installation |
| Timeframe | Weeks, dependent on trade availability | Delivered and installed by Envoy’s team, no separate build phase |
| Floor space lost | Roughly 15–30cm per wall for the floating frame and air gap | Fixed external footprint, known before you buy |
| Reversibility | One-way structural change; difficult to undo | Modular, tool-free assembly; can be disassembled and relocated |
| Isolation performance | Strong if built correctly; flanking noise is the main risk | 45dB average (double-wall) to 47dB average / up to 62dB peak (triple-wall), ISO 717-1 compliant |
| Best fit | An owned home already undergoing a full renovation, where the trades are on site regardless | Renters, leased offices, schools, and anyone who doesn’t want a permanent structural change |
If you already own the building and you’re gutting the room as part of a wider renovation, a site-built room-in-a-room can make sense, since the trade cost is already partly absorbed by the broader project. For almost everyone else, especially anyone in a leased or rented space, a prebuilt booth reaches the same isolation outcome without the structural commitment. If you’re working through this decision for a specific space, Envoy’s acoustic testing and assessment service can measure what you’re actually dealing with before you commit either way.
For readers whose use case is specific rather than general-purpose, it’s worth looking at music recording or vocal booth configurations directly, since the internal treatment differs from a general-purpose office booth.
Soundproofing a music room or home studio specifically
How do you soundproof a room for music? The short answer is that it’s the same room-in-a-room method described above, but musicians and producers generally need isolation working in both directions at once: keeping practice noise, drum kits and amplifiers from disturbing neighbours or family, and keeping outside noise from bleeding into a recording.
That two-way requirement doesn’t change the four elements involved, but it does raise the bar on execution, because a music room typically needs to handle a wider range of frequencies, including low-end bass and drum transients, which are the hardest frequencies for mass and decoupling alone to stop. This is exactly the scenario where flanking noise becomes most costly: a home studio with an otherwise well-built wall but an untreated door or a shared ceiling void will still leak the loudest, lowest-frequency sound in the room.
It’s also where the prebuilt case for a dedicated booth is strongest, because the internal acoustic treatment (absorption tuned for speech and instrument clarity, not just isolation) is engineered as part of the unit rather than added afterward. For vocal-specific work, a dedicated vocal booth is tuned differently to a general music room, and for tracking and production, a purpose-built recording booth separates isolation from internal acoustics in a way that’s difficult to replicate in a converted spare room. Studiobricks booths are also in active use in real teaching environments; you can see how several music schools have used this approach to add rehearsal and recording spaces without disrupting an existing building.
FAQ
Is room-in-a-room soundproofing the same as soundproof foam?
No. Foam panels absorb sound within a room to reduce echo and improve internal sound quality, but they don't stop sound from passing through walls, floors or ceilings. Room-in-a-room construction decouples a new structure from the existing one, which is what actually blocks sound transmission between spaces.
How much space does room-in-a-room construction take up?
A site-built room-in-a-room typically reduces usable floor space by around 15 to 30cm per wall, since an effective air gap between the new and old structure is essential to how decoupling works. A prebuilt booth has a fixed external footprint that's known before installation, which makes planning easier in a smaller room.
Can you soundproof a room without construction?
Not to the same standard. Some improvement is possible with door seals, heavier curtains and rugs, but none of these address the structural mass, decoupling and damping that real isolation requires. A prebuilt acoustic booth is the closest option to construction-grade isolation that doesn't involve building work, since the isolation is engineered into the unit itself rather than added to an existing room.
What causes DIY soundproofing to underperform?
The most common cause is flanking noise: sound travelling around a well-built wall via an indirect path, such as a shared ceiling cavity, an unsealed gap, ducting, or an untreated door. A wall built correctly with all four elements (decoupling, mass, absorption and damping) can still underperform badly if any flanking path is missed elsewhere in the room.